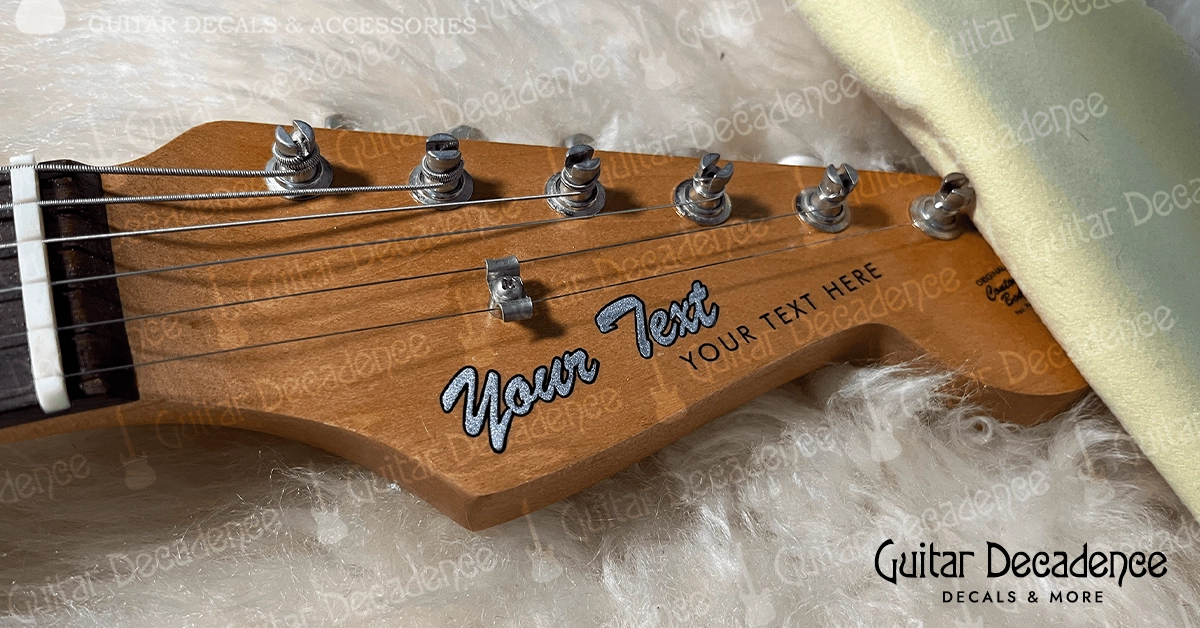
Customizing your guitar with a waterslide decal is a simple way to add personality, professionalism, and style to your instrument. Whether you’re restoring a vintage model, finishing a DIY build, or just adding a personal touch, waterslide decals can make your guitar look polished and unique.
In this guide, we’ll walk you through everything you need to know about applying a waterslide decal to your guitar headstock.
What Is a Waterslide Decal?
A waterslide decal is a thin, transparent transfer that slides off its backing paper when soaked in water. It includes a light adhesive that helps it adhere to the surface once applied. Guitar companies like Fender and Gibson have used them for decades to brand their headstocks. Unlike stickers or vinyl, waterslide decals sit flush with the surface, giving your guitar a factory-finished appearance once sealed with lacquer or clear coat.
The great thing about waterslide decals is that they adhere well to almost any flat and smooth surface, making them perfect for guitar headstocks.
Tools and Materials You’ll Need
Before getting started, gather the following:
- Your waterslide decal (custom or pre-made)
- A small bowl of water
- Fine scissors or a craft knife
- Tweezers (optional, for precision)
- Paper towels or a soft cloth
- Clear coat spray or lacquer (for sealing)
- Fine-grit sandpaper (optional, for surface prep)
Step 1: Prepare the Headstock Surface
Make sure your headstock is clean and smooth. Wipe it down to remove dust, oils, or residue. If you’re working with raw wood or a refinished guitar, it’s best to apply at least a base layer of clear coat before adding the decal — this prevents the decal from sinking into the grain.
Step 2: Cut Out the Decal
Using sharp scissors or a craft knife, carefully cut around your decal, leaving a minimal border. The closer you trim, the more seamless it will appear on the guitar.
Step 3: Soak the Decal
Important: Waterslide decals must be sealed with a clear coat before being submerged in water. Without this protective layer, the ink will disintegrate and the design will fall apart.
- If your guitar has a matte or satin finish, you may want to use a matte clear coat to finish the decal so that it blends more naturally with the surrounding headstock surface.
- For glossy headstocks, standard lacquer or gloss clear coat will give a factory-like shine.
At Guitar Decadence, all of our customized decals come with a protective clear coat already applied. That means you can skip this extra step — just place the decal in water for about 20–30 seconds, and it will be ready to apply.
Step 4: Apply the Decal
Gently slide the decal onto the headstock, positioning it exactly where you want it. You can use tweezers to help guide it, but fingers work fine too. Once in place, smooth out any air bubbles or excess water with a damp paper towel or soft cloth.
Step 5: Let It Dry
Leave the decal to fully dry — usually at least 12–24 hours. Patience here pays off, as applying lacquer too soon can cause wrinkles or lifting.
Optional Step 6: Seal with Clear Coat
Once dry, spray several light layers of clear coat or lacquer over the decal, allowing each coat to dry before adding the next. This not only protects the decal but also blends it seamlessly with the headstock finish.
Make sure that the clear coat you use in this step does not adversely react with the clear coat on the waterslide decal itself. The waterslide decals we make have an acrylic clear coat, which is compatible with just about any finish and almost never causes issues. Our customers have used Polyurethane, nitrocellulose lacquer, regular spray can clear paints, Tru-Oil, and Shellac without any problems.
For a glassy, professional look, you can lightly sand between coats with fine-grit sandpaper.
Tips for a Professional Finish
- Apply decals in a dust-free environment to avoid particles getting trapped.
- Build up multiple thin layers of clear coat rather than one heavy layer.
- Allow plenty of curing time before handling or restringing your guitar.
👉 For more advanced tips on achieving a true factory-quality finish, check out our detailed finishing guide.
Where to Get Custom Guitar Headstock Decals
If you’re looking to add a personalized touch to your guitar, a custom decal is the perfect solution. At Guitar Decadence, we specialize in designing and producing custom waterslide decals for guitar headstocks. Our process is simple: you choose the text, we create the design, and once you approve it over e-mail, we print and ship your decal ready for application.
Whether you’re building your dream guitar, restoring a vintage instrument, or just want to make your headstock stand out, a custom headstock decal can give your guitar that professional finish.
Final Thoughts
Applying a waterslide decal to your guitar headstock is a rewarding DIY project that instantly elevates your instrument’s look. With a little patience and care, you can achieve results that look just as good as factory branding. And if you’re ready to create your own unique decal, check out the options from Guitar Decadence — we’d be happy to help bring your vision to life.


Leave a Reply